Cone Tool  
Creates a cone
Steps
Select
Cone ToolDrag the mouse on a floor or an another polygon to draw a disk.
Release
LMBand move the mouse cursor in a normal direction to raise the height.Click
LMBto stop raising.Type the count of edges in
Segmentfield, radius inRadiusfield and height inHeightfield if necessary.Press
SPACEto complete or PressESCto cancel.
Interface
LMB DragDraws a disk.
SPACECompletes creating a cone
ESC
Cancels creating a cone.
Properties
- Select Only Visible
If on, the shape can be built on only a visible polygon. Namely backfaced or occluded polygons are excluded.
- Floor Height
The height of the floor where the primitive shape is built by LMB Dragging.
- Segments
The count of side faces
- Radius
A radius of a cone
- Height
A height of a cone
- Angle Snap
When you drag the mouse with this property on, the disk’s direction will snap to every 90 degree.
- Auto Smoothing
Creates smoothed surfaces which have a common smoothing group.
- Border Check
If this is enabled, the ray cast will run and it checks if the created cone is beyond the other polygons. It might cause a stop for a second at the beginning.
- Glue
The cone with this property enabled will be glued to the polygon where it started to be created. It means that the hidden part of the floor polygon by the created cone is removed.
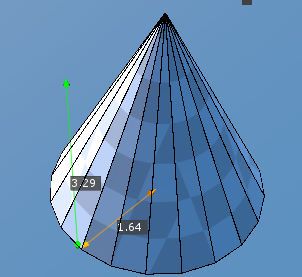
Cone created on the floor.
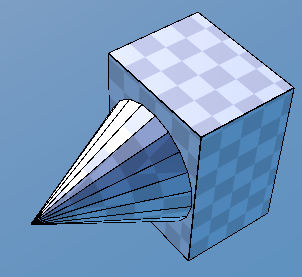
Cone created on the other polygon.